Plans for Woodworking: Free and Premium DIY Project Ideas

Plans for Woodworking: Free and Premium DIY Project Ideas

The satisfying scent of freshly cut wood, the rhythmic whir of the saw, the gradual transformation of raw materials into beautiful, functional objects – woodworking offers a unique blend of creativity and craftsmanship. Whether you're a seasoned artisan or a curious beginner, the world of DIY woodworking projects is vast and rewarding. This article explores a range of free and premium plans to ignite your imagination and get you building.

Free Woodworking Plans: Unleash Your Inner Craftsman

Embarking on your woodworking journey doesn't require a hefty financial investment. Numerous websites and online communities offer a treasure trove of free woodworking plans, catering to all skill levels. These plans provide detailed instructions, diagrams, and material lists, guiding you step-by-step through the construction process. Don't underestimate the value of these free resources! They offer a fantastic opportunity to learn new techniques, experiment with different designs, and build your confidence.

Easy Projects for Beginners

If you're just starting, begin with simple projects like a birdhouse, a small shelf, or a basic cutting board. These projects require minimal tools and materials, allowing you to focus on mastering fundamental woodworking techniques like measuring, cutting, and sanding. You'll quickly gain a sense of accomplishment, motivating you to tackle more complex projects in the future. Look for plans with clear, concise instructions and plenty of visuals.

Consider these beginner-friendly options:

  • A simple coat rack
  • A rustic spice rack
  • A decorative wooden box

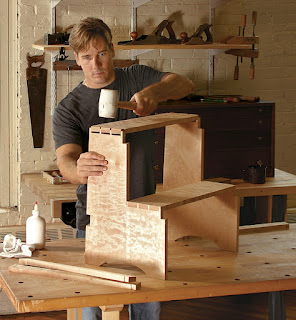
Intermediate Challenges: Stepping Up Your Game

Once you've mastered the basics, you can explore more challenging projects. Think about building a sturdy workbench, a stylish coffee table, or a charming Adirondack chair. These projects introduce you to more advanced joinery techniques, such as mortise and tenon joints, and require greater precision and planning. Remember to carefully review the plans and prepare your workspace before starting.

Premium Woodworking Plans: Investing in Your Craft

While free plans are a great starting point, premium plans often offer a superior level of detail, professional-quality designs, and access to expert support. These plans frequently include high-resolution diagrams, detailed material lists with specific sourcing recommendations, and even video tutorials to guide you through every step. The investment in a premium plan can be well worth it, especially for intricate projects that you want to execute flawlessly.

The Benefits of Premium Plans

Premium woodworking plans often provide several key advantages. They frequently include:

  • Detailed cut lists and material specifications: Eliminating guesswork and ensuring you have the exact materials needed.
  • Step-by-step instructions with clear visuals: Minimizing confusion and making the process easier to follow.
  • Expert support and troubleshooting: Providing assistance if you encounter challenges during construction.
  • Access to a community of fellow woodworkers: Offering opportunities for collaboration and learning from experienced craftspeople.

Choosing the Right Premium Plan

When selecting a premium woodworking plan, carefully consider the project's complexity, your skill level, and the quality of the instructions. Read reviews from other woodworkers, and ensure the plan provider offers reliable customer support. Don't hesitate to invest in a plan that aligns with your aspirations and capabilities. The result will be a project you're truly proud of, made with skill and precision.

Whether you choose free or premium woodworking plans, remember the journey is just as important as the destination. Embrace the learning process, enjoy the creative challenge, and savor the satisfaction of crafting beautiful and functional pieces with your own two hands.

Woodworking Plans for Beginners: Step-by-Step Guides

Woodworking Plans for Beginners: Step-by-Step Guides

Hey there, future woodworkers! So you're thinking about taking the plunge into the wonderful world of woodworking? Fantastic! It's a rewarding hobby that combines creativity, problem-solving, and the satisfying smell of freshly cut wood. But where do you even begin? Don't worry, I've got you covered. This guide is packed with beginner-friendly projects and tips to help you get started on your woodworking journey.

Getting Started: Tools and Safety

Before you dive into building your masterpiece (even a small one!), you'll need a few essential tools. Don't feel pressured to buy everything at once. Start with the basics and gradually expand your collection as you gain experience.

Essential Tools for Beginners:

  • Measuring Tape: Accurate measurements are crucial. Get a reliable tape measure that's easy to read.
  • Pencil: For marking your cuts and designs. A carpenter's pencil is ideal as it leaves a clear mark.
  • Hand Saw: A good quality hand saw is perfect for beginners, allowing you to learn proper sawing techniques. A coping saw is also helpful for intricate cuts.
  • Screwdriver (Phillips and Flathead): For assembling projects that use screws.
  • Hammer: For driving nails (though screws are generally preferred for beginners).
  • Safety Glasses: This is non-negotiable. Protect your eyes from flying wood chips and debris.
  • Work Gloves: Protect your hands from splinters and rough wood.
  • Clamps: Essential for holding pieces together while gluing or screwing them.

Safety First! Always wear safety glasses, and consider a dust mask if you're working with power tools later on. Work in a well-lit, organized space. Take your time, and don't rush the process. A little patience goes a long way in woodworking.

Your First Projects: Simple and Satisfying

Starting with simple projects builds confidence and teaches you fundamental techniques. Here are a few ideas to get you going:

1. A Simple Shelf:

This is a classic beginner project. All you need are some planks of wood (pine is inexpensive and easy to work with), screws, and a drill. Measure, cut, and assemble the planks to create a basic shelf. This project teaches you about measuring, cutting, and basic assembly.

2. A Wooden Coasters Set:

Cut squares or circles from scrap wood and sand them smooth. You can personalize these coasters with paint, stain, or even burning designs. This project emphasizes sanding techniques and finishing touches.

3. A Birdhouse:

A little more challenging, but still manageable for beginners. You can find free plans online for simple birdhouses. This project introduces you to more complex cuts and assembly techniques.

4. A Key Holder:

This project is perfect for practicing your cutting, sanding, and finishing skills. You can make a simple key holder from a single piece of wood, or get creative with multiple pieces and designs. Adding hooks is a great way to improve your skills further.

Moving on to More Advanced Projects (Eventually!)

Once you've mastered the basics, you can move on to more complex projects. These projects require more advanced tools and techniques, but the satisfaction of completing them is immense!

Intermediate Projects:

  • Small Table: A coffee table or end table is a great intermediate project. It involves more precise measurements, joinery techniques, and finishing.
  • Picture Frame: Making a picture frame involves miter cuts, precise assembly, and finishing. It's a great way to practice your joinery skills.
  • Cutting Board: Cutting boards require careful planning, precise cuts, and attention to detail. The choice of wood is crucial for durability and food safety.

Remember, even more advanced projects start with simple steps. Don't be afraid to break down complex projects into smaller, manageable tasks. Each completed step brings you closer to your finished masterpiece!

Resources for Woodworking Plans

Finding woodworking plans is easier than ever. There are countless resources available online and in print:

  • Online Woodworking Communities: Join online forums and groups to connect with other woodworkers, share ideas, and ask for help.
  • Websites with Free Plans: Many websites offer free woodworking plans for all skill levels. Just search for "free woodworking plans for beginners."
  • Woodworking Magazines and Books: Magazines and books provide detailed plans, instructions, and tips from experienced woodworkers.
  • YouTube Tutorials: YouTube is a treasure trove of woodworking tutorials. Many creators offer step-by-step guides for various projects.

Remember to always check the reviews and ratings before selecting a plan to ensure it's suitable for your skill level and has clear instructions.

Commonly Asked Questions

Here are some questions beginners frequently ask:

  • Q: What type of wood should I use for my first project? A: Pine is a great option for beginners because it's inexpensive, easy to work with, and readily available.
  • Q: How do I choose the right woodworking plans? A: Start with simple projects that match your skill level. Look for plans with clear instructions and diagrams.
  • Q: What if I make a mistake? A: Don't worry! Mistakes happen to everyone. Woodworking is a learning process. If you make a mistake, you can often fix it or start over.
  • Q: What are the best finishing techniques for beginners? A: Simple sanding followed by a clear coat of varnish or polyurethane is a good starting point.
  • Q: How much will it cost to get started? A: You can start with basic hand tools for a relatively low cost. As you progress, you can gradually invest in more advanced power tools.
  • Q: Where can I find scrap wood? A: Check with local lumberyards, construction sites (with permission!), and even your own home for reusable wood.

So there you have it! Woodworking can be a challenging but incredibly rewarding hobby. Don't be afraid to get your hands dirty, experiment, and most importantly, have fun!

Pallet Wood Wall Hangings

Repurposed Pallet Wood: Your Guide to Awesome Wall Hangings

Hey there, fellow crafters! Ever walked past a stack of discarded pallets and thought, "There's gotta be something cool I can do with those?" Well, you're in luck! Pallet wood is a goldmine of rustic charm, waiting to be transformed into unique and stunning wall hangings. This isn't your grandma's wall décor â€" we're talking seriously stylish, affordable, and totally personalized creations. Let's dive in!

Why Choose Pallet Wood for Wall Hangings?

Before we get to the fun part (making!), let's talk about why pallet wood is such a fantastic choice for DIY projects. For starters, it's cheap! Often, you can find pallets for free or very little money. Seriously, check out your local construction sites or ask around â€" businesses often discard them. Second, it's sustainable. Repurposing old materials is a great way to reduce waste and give something new life. And finally, it has that amazing rustic aesthetic. The weathered look, the knots in the wood, the variations in color â€" it all adds character that's hard to replicate with new lumber.

Preparing Your Pallet Wood

Okay, so you've got your pallets. Now what? Before you get your creative juices flowing, you need to prep the wood. This step is crucial for safety and a long-lasting project.

Safety First!

Seriously, this is important. Palets may have been treated with chemicals, and some may harbor splinters or nails. Always wear safety glasses and gloves when handling pallets. Carefully inspect each piece of wood and remove any loose nails or staples using a claw hammer. If you find any particularly nasty splinters, use sandpaper to smooth them out.

Cleaning and Sanding

Once you've removed all the hardware, give the wood a good clean. A wire brush can help get rid of stubborn dirt and debris. After cleaning, you'll want to sand the wood. Start with coarser sandpaper (like 80-grit) to remove any rough patches and then move to finer sandpaper (like 120-grit) for a smoother finish. Don't be afraid to get elbow grease into this stage; the smoother the wood, the easier it will be to work with and the better your final product will look.

Treating the Wood (Optional)

Depending on where you sourced your pallets and your planned use for the wall hanging, you might want to consider treating the wood. A wood sealant or stain can help protect it from moisture and pests, as well as enhance its natural beauty. If you're going for a more natural look, a clear sealant will do the trick. If you want to change the color, choose a stain that complements your décor.

Design Ideas for Your Pallet Wood Wall Hangings

Now for the fun part: designing your masterpiece! The possibilities are endless, but here are a few ideas to get your creative wheels turning:

Geometric Designs

Cut the pallet wood into various shapes â€" squares, rectangles, triangles â€" and arrange them in an interesting geometric pattern. You can paint them different colors or leave them natural for a more rustic look. This is a great option for modern or minimalist interiors.

Rustic Shelves

Create a small, rustic shelf using pallet wood. These are perfect for displaying small plants, candles, or other decorative items. You can easily attach them to the wall using sturdy brackets or even repurpose some of the original pallet supports.

Framed Artwork

Use the pallet wood to create a unique frame for a piece of artwork or a photograph. This adds a rustic, handmade touch to any piece. You could even create a layered effect using different widths of wood.

Word Art

Cut individual letters out of the pallet wood to spell out a favorite word, quote, or name. Paint the letters and arrange them on the wall for a personalized touch. This works especially well in a farmhouse or shabby chic setting.

Mirror Frames

Give an old mirror a makeover by creating a frame out of pallet wood. This is a fantastic way to add a rustic yet elegant element to your bathroom or bedroom.

Layered Wall Art

Create a more complex wall hanging by layering different pieces of pallet wood. This allows for interesting texture and depth. You can vary the size and placement of the wood pieces to create a truly unique design.

Finishing Touches and Mounting

Once your design is complete, it's time for the finishing touches. This might involve a final sanding, a coat of sealant, or even some decorative painting. After that, it's time to mount your creation! Use appropriate hanging hardware for the weight of your wall hanging. If you're unsure, it’s always best to err on the side of caution and use stronger hardware than you think you need.

Commonly Asked Questions

Here are some frequently asked questions about creating pallet wood wall hangings:

  • Q: Where can I find free pallets? A: Check with local businesses, construction sites, and even grocery stores. Many businesses are happy to get rid of them!
  • Q: What kind of paint should I use on pallet wood? A: Acrylic paints work well on wood. Make sure to apply a primer beforehand for better adhesion and color vibrancy.
  • Q: How do I prevent the wood from warping? A: Properly sealing the wood with a sealant helps prevent warping and moisture damage.
  • Q: Is it safe to use pallets that have been treated with chemicals? A: It’s best to avoid pallets that are clearly labeled as treated with chemicals. If you're unsure, it’s best to err on the side of caution and not use them.
  • Q: What tools do I need? A: You'll need a hammer, nails or screws, sandpaper (various grits), safety glasses, gloves, and possibly a saw, depending on your design.
  • Q: Can I use pallets that have been outside for a long time? A: Yes, but be prepared for more cleaning and sanding, as they'll likely have more dirt, grime, and potentially damaged wood.

And there you have it! With a little creativity and effort, you can transform discarded pallets into stunning and unique wall hangings. Happy crafting!

Simple Woodworking Plan for a Custom Wooden Wall Sign for a Nursery

Craft a Cherished Keepsake: A Custom Nursery Wall Sign

Welcome to the delightful world of woodworking! This project guides you through creating a personalized wooden wall sign, perfect for adding a touch of handmade charm to any nursery. Forget mass-produced decorations; let's build a truly unique piece that will be treasured for years to come. We'll focus on simplicity, making this project accessible to even beginner woodworkers. Get ready to unleash your creativity and craft a lasting memory for your little one (or a special gift for someone you love).

Choosing Your Materials: The Foundation of Your Sign

Selecting the right materials lays the groundwork for a successful project. For this charming nursery sign, consider using a softwood like pine or basswood. These woods are readily available, easy to work with, and accept paint or stain beautifully. Avoid hardwoods for this project, as they can be more challenging for beginners to cut and shape. You'll also need:

  • A piece of wood roughly 12" x 18" (adjust to your desired size)
  • Sandpaper (various grits, from coarse to fine)
  • Wood stain or paint (choose colors that complement your nursery’s theme)
  • Paintbrushes or rags for applying stain/paint
  • Wood glue
  • Saw (hand saw or jigsaw)
  • Measuring tape and pencil
  • Letters/designs (you can either buy pre-made wooden letters or cut your own from wood scraps using a jigsaw or scroll saw)
  • Optional: Clear sealant to protect your finished sign

Preparing the Wood: Smoothing the Way

Cutting and Shaping Your Wood

Begin by carefully measuring and cutting your chosen wood to your desired dimensions. A straight cut is essential, so take your time and ensure your saw is properly aligned. If you're using a jigsaw, use a fine-toothed blade for a cleaner cut. A hand saw will also work fine but requires a little more time and effort. Remember safety first - always wear safety glasses while using power tools.

Sanding for a Smooth Finish

Once you’ve cut your wood, grab your sandpaper. Start with a coarser grit to remove any rough edges or imperfections, then gradually move to finer grits to achieve a smooth surface. Proper sanding prevents splinters and ensures a professional-looking finish. Pay close attention to the edges and corners for a polished look.

Personalizing Your Sign: Adding the Creative Touch

Now comes the fun part â€" adding your personal touch! You have several options here: You can paint a design directly onto the wood, use stencils for precise lettering or imagery, or attach pre-made wooden letters. If you are using pre-made wooden letters, arrange them on the wood before gluing to ensure proper spacing and placement. Use wood glue to securely fasten the letters. Let the glue dry completely before moving on to the next step.

Finishing Your Masterpiece: Protecting and Displaying

Once the glue is dry (and your paint or stain is completely cured), apply a clear sealant to protect your beautiful creation. This will prevent scratches and damage, ensuring your sign remains a cherished keepsake for years. Allow the sealant to dry fully before carefully hanging your custom nursery sign. You can use sawtooth hangers or small nails on the back for easy hanging. Now admire your handiwork â€" a truly unique and personal addition to your nursery!

DIY Custom Wooden Signs for Wedding and Gifts

Crafting Bespoke Wooden Signs: An Elevated Approach to Wedding Decor and Personalized Gifting

The allure of handcrafted items, imbued with personal touches and enduring quality, continues to resonate deeply in our increasingly mass-produced world. For weddings and gift-giving occasions, the handcrafted wooden sign stands as a testament to thoughtful artistry and lasting sentiment. This comprehensive guide delves into the process of creating your own bespoke wooden signs, from selecting materials to mastering the finishing touches, providing a detailed blueprint for crafting unique and memorable pieces.

Choosing Your Medium: Wood Selection and Preparation

The foundation of any successful wooden sign lies in the careful selection and preparation of the wood itself. The type of wood you choose will significantly impact the final aesthetic and durability of your creation. Consider the following factors:

Wood Species: A Spectrum of Options

A diverse range of wood species offers unique characteristics. Pine, for instance, is readily available, relatively inexpensive, and accepts paint and stain well, making it an excellent choice for beginners. Oak, renowned for its strength and rich grain patterns, provides a more luxurious feel, ideal for formal settings or high-end gifts. Birch, with its smooth surface and light color, offers a clean, contemporary aesthetic. Reclaimed wood, salvaged from old structures, imbues a sense of history and character, adding a unique patina to your creation. The choice ultimately depends on your desired aesthetic, budget, and the intended purpose of the sign.

Wood Preparation: Ensuring a Smooth Foundation

Before embarking on the creative process, meticulous preparation is paramount. This involves several crucial steps:

  • Sanding: Thorough sanding is essential to achieve a smooth surface, free from splinters and imperfections. Begin with coarser grit sandpaper (e.g., 80-grit) to remove any major irregularities, gradually progressing to finer grits (e.g., 120-grit, 220-grit) for a perfectly polished finish. Pay close attention to edges and corners to prevent rough patches.
  • Cleaning: After sanding, carefully clean the wood surface to remove any dust particles. A tack cloth or a slightly damp cloth is ideal for this purpose. Dust particles trapped beneath paint or stain can compromise the final finish.
  • Priming (Optional): For certain projects, particularly those involving painted designs, applying a primer can enhance paint adhesion and prevent bleed-through of the wood grain. Choose a primer suitable for the type of paint you intend to use.

Design and Layout: Translating Vision into Reality

The design phase is where your creativity takes center stage. Consider the overall message, font choices, and any decorative elements that will complement the aesthetic of your sign. A well-thought-out design will elevate the finished product from a simple message board to a work of art.

Conceptualizing Your Message: Clarity and Conciseness

For wedding signs, the message should be clear, concise, and evocative of the occasion. Consider using elegant fonts and classic wording. For gifts, personalize the message to reflect the recipient's personality and the occasion being celebrated. Keep the message brief and impactful, avoiding overly verbose phrasing.

Font Selection: The Visual Voice of Your Sign

The chosen font significantly influences the overall aesthetic. Serif fonts, with their delicate flourishes, exude elegance and tradition, making them ideal for formal settings. Sans-serif fonts offer a clean, modern look, suited for contemporary designs. Script fonts add a touch of romanticism, while bolder fonts create a more impactful statement. Experiment with different fonts to find the perfect match for your message and design.

Layout and Composition: Achieving Visual Harmony

Effective layout is crucial to ensure the message is easily legible and visually appealing. Consider the size and spacing of the text, as well as the placement of any decorative elements. Maintain balance and symmetry, ensuring the elements are harmoniously arranged within the confines of the wood panel. Sketching your design beforehand is highly recommended, allowing you to refine the composition before committing to the final creation.

Crafting Techniques: From Stenciling to Freehand Painting

Once your design is finalized, you can choose from several techniques to bring your vision to life. Each method offers unique advantages and requires different levels of skill.

Stenciling: Achieving Precision and Consistency

Stenciling provides a precise and consistent approach, particularly useful for intricate designs or repetitive patterns. Cut your stencil from a durable material like vinyl or acetate, ensuring clean, sharp edges. Secure the stencil firmly to the wood surface, applying paint evenly with a brush or sponge. Remove the stencil carefully to reveal the crisp, defined design.

Freehand Painting: Unleashing Your Artistic Flair

Freehand painting allows for greater artistic expression and personalization. This method requires a steadier hand and some practice to achieve consistent results. Use high-quality brushes and paints, ensuring smooth strokes and even coverage. Consider using multiple layers of paint to achieve the desired depth and richness of color.

Burning and Carving: Adding Textural Depth

Wood burning and carving add textural depth and a unique handcrafted feel. Wood burning tools allow you to etch your design directly into the wood, creating a rustic and charming effect. Carving requires more skill and specialized tools, but it produces intricate and detailed results.

Finishing Touches: Protecting and Enhancing Your Creation

The final stage involves protecting your wooden sign from the elements and enhancing its overall appearance. Proper finishing will ensure your creation lasts for years to come.

Sealing and Protecting: Ensuring Longevity

Applying a sealant, such as polyurethane or varnish, protects the wood from moisture and UV damage, extending the life of your sign. Choose a sealant that complements your chosen finishing technique â€" a matte sealant will retain the natural look of the wood, while a glossy finish adds shine and depth.

Hardware and Mounting: A Secure and Elegant Presentation

Depending on the intended use, you may need to attach hardware such as sawtooth hangers, keyhole hangers, or D-rings. Choose hardware that complements the style and weight of your sign, ensuring a secure and aesthetically pleasing presentation.

Crafting bespoke wooden signs is a rewarding experience, combining creativity, precision, and a touch of personal magic. By following these steps and adapting the techniques to your own artistic vision, you can create unique and lasting keepsakes that will be treasured for generations.

Rustic cabinet woodworking designs for charming interiors

Rustic Cabinet Woodworking Designs for Charming Interiors

Hey there, fellow woodworking enthusiasts and lovers of all things cozy! Let's talk about rustic cabinets. There's just something so wonderfully charming about incorporating these pieces into your home, isn't there? They add a touch of warmth, character, and a hint of that old-world craftsmanship we all secretly adore. Whether you’re a seasoned woodworker or just starting out, this guide will walk you through designing and building rustic cabinets that will become cherished features in your home.

Understanding the Rustic Aesthetic

Before we dive into specific designs, let's get a grasp on what makes a cabinet "rustic." It's not just about slapping some distressed paint on anything and calling it a day. Rustic design embraces imperfection â€" think natural wood grain showing through, slightly uneven surfaces, and maybe even a few charming knots. The overall feeling should be one of warmth, age, and handcrafted authenticity.

Key Elements of Rustic Cabinetry

Think about these elements when planning your project:

  • Wood Choice: Reclaimed wood is a fantastic choice for that genuine rustic look, but if that's not feasible, consider rustic-looking hardwoods like oak, pine, or walnut. Their natural variations in color and texture add to the charm.
  • Finishes: Stay away from super glossy finishes. A simple oil finish, a clear wax, or even a slightly distressed paint finish will highlight the wood’s natural beauty without masking its imperfections.
  • Hardware: Choose simple, sturdy hardware that complements the rustic vibe. Think wrought iron pulls, antique-style knobs, or even simple wooden pegs.
  • Construction Techniques: While precision is important, don't be afraid to embrace a slightly more "handmade" look. Visible joinery, like mortise and tenon joints, adds to the authentic feel.

Rustic Cabinet Design Ideas

Now for the fun part â€" brainstorming your design! Let’s explore a few ideas to inspire you:

The Farmhouse Kitchen Cabinet

Picture this: a spacious kitchen with cabinets boasting thick, slightly distressed pine doors. The wood shows its age gracefully, with subtle variations in color and texture. Simple, sturdy wrought iron pulls add a touch of elegance. Maybe you add some open shelving on top for displaying your favorite pottery.

The Rustic Bathroom Vanity

A rustic bathroom vanity can transform your bathroom into a spa-like retreat. Imagine a reclaimed wood vanity with a thick, chunky countertop, perhaps made of marble or butcher block. Simple, understated hardware completes the look, creating a space that’s both functional and visually stunning.

The Living Room Media Cabinet

Instead of a sleek, modern media cabinet, consider a rustic masterpiece! Think wide, sturdy shelves to display your cherished records or books. Perhaps it features deep drawers for storing movies and games. The wood grain is the star here, and you'd add subtle hardware to let the natural beauty shine.

The Entryway Storage Cabinet

Make a statement as soon as guests enter your home! A rustic entryway cabinet can store shoes, coats, and other essentials while enhancing your home's aesthetic. Consider a tall, slender design with multiple shelves and drawers, perhaps incorporating a small bench for seating.

Choosing Your Wood and Tools

The heart of any rustic cabinet project is the wood. As mentioned, reclaimed wood offers unmatched character, but sourcing it can be challenging. Local salvage yards and demolition sites are good places to start. If reclaimed wood isn't an option, opt for rustic-looking hardwoods like oak, pine, or walnut. Remember to select boards with interesting grain patterns and knots â€" these imperfections add to the rustic charm!

Tool-wise, you’ll need the standard woodworking arsenal: a saw (circular saw, hand saw, or table saw), a planer, a jointer (helpful but not strictly necessary), chisels, clamps, sandpaper, and of course, safety glasses and hearing protection.

Construction Techniques for Rustic Cabinets

For a truly rustic look, consider using traditional joinery techniques such as mortise and tenon joints. These not only add strength but also contribute to the handcrafted aesthetic. However, don’t be afraid to utilize more modern techniques like pocket holes, especially for internal cabinet construction, to speed up the process.

Remember, the beauty of rustic woodworking lies in embracing imperfection. Don't stress about achieving perfect symmetry or flawless surfaces. Slight variations and visible joinery are part of the charm!

Finishing Touches and Distressing Techniques

The final step is bringing your cabinet to life with a finish and distressing techniques. For a rustic look, steer clear of high-gloss finishes. Instead, opt for a natural oil finish, a clear wax, or a slightly distressed paint finish. To create a distressed look, consider sanding down edges and corners to reveal the wood underneath the paint. You can even add some faux distressing with a hammer and chisel to simulate age and wear.

Frequently Asked Questions

Q: What type of wood is best for rustic cabinets?

A: Reclaimed wood is ideal, but hardwoods like oak, pine, and walnut work well too. Look for boards with interesting grain and knots.

Q: How do I create a distressed look on my cabinets?

A: Sand down edges and corners, use a hammer and chisel to create small dents and scratches, or apply paint then distress it by sanding or chipping away.

Q: What kind of hardware should I use?

A: Simple, sturdy hardware like wrought iron pulls, antique-style knobs, or wooden pegs complements the rustic style.

Q: Can I build a rustic cabinet if I'm a beginner?

A: Absolutely! Start with a simple design and don't be afraid to embrace imperfections. There are many online resources and tutorials to guide you.

Q: How do I maintain my rustic cabinets?

A: Regular dusting is key. Depending on the finish, you may need to occasionally reapply wax or oil to maintain the wood’s appearance.

There you have it! I hope this guide has sparked your creativity and inspired you to embark on your own rustic cabinet project. Remember, the most important thing is to have fun and let your personality shine through in your design. Happy woodworking!

Free contemporary woodworking plans for elegant storage solutions

Unlock Your Inner Craftsman: Free Contemporary Woodworking Plans for Elegant Storage

Hey there, fellow woodworking enthusiasts! Let's talk about something we all crave: more stylish and functional storage. Clutter's a sneaky villain, right? But what if we could fight back with beautiful, handcrafted pieces that reflect our personal style? That's where these free contemporary woodworking plans come in. I’ve gathered some ideas to help you organize your space in a way that's both practical and aesthetically pleasing. Forget those boring, mass-produced storage solutions â€" let’s build something special!

A Floating Shelf Masterpiece: Minimalist Style

This project is perfect for beginners and seasoned woodworkers alike. A floating shelf offers a clean, contemporary look, and you can customize it to fit any space in your home. We're talking about that effortlessly chic vibe, you know? The kind that makes your friends ask, "Where did you get that?" The answer? "I built it!" (Insert smug grin here).

Materials You'll Need:

Keep in mind that the exact quantities will depend on the dimensions of your shelf. Always buy a little extra to account for mistakes (we've all been there!).

  • Wood (e.g., maple, walnut, oak â€" choose your favorite!)
  • Wood screws
  • Wall anchors (appropriate for your wall type)
  • Wood glue
  • Sandpaper (various grits)
  • Wood finish (stain, paint, or varnish â€" your choice!)
  • Measuring tape
  • Drill
  • Level

Building the Shelf:

This is a simplified version, of course! You can find detailed plans online (I'll link some helpful resources at the end!), but here's the basic gist:

  1. Cut your wood to the desired dimensions.
  2. Sand all surfaces smooth.
  3. Apply wood glue and carefully assemble the shelf components.
  4. Use screws to secure the joints.
  5. Once the glue is dry, sand again for a flawless finish.
  6. Apply your chosen finish and let it dry completely.
  7. Mark the wall where you want to mount the shelf, using a level.
  8. Drill pilot holes and install wall anchors.
  9. Secure the shelf to the wall using screws.

Remember, safety first! Always wear safety glasses and a dust mask when working with wood.

A Stylish Magazine Rack: Functionality Meets Form

This project is a bit more challenging but offers a fantastic reward: a sleek magazine rack that keeps your reading material organized and looks great doing it. Think clean lines, simple design â€" perfect for that modern living room or office space.

What You'll Need:

  • Wood (e.g., pine, birch â€" something easy to work with)
  • Wood screws
  • Dowels (for added strength and a nice look)
  • Wood glue
  • Sandpaper
  • Wood finish
  • Measuring tape
  • Drill
  • Kreg Jig (optional, but highly recommended for clean pocket hole joinery)

Constructing Your Magazine Rack:

Again, detailed plans are readily available online, but the general process involves creating a frame with angled supports to hold your magazines. The dowels not only add strength but provide a beautiful visual detail. Using a Kreg Jig makes the process significantly easier and produces a much cleaner finished product.

If you’re a beginner, this project is a great way to learn about pocket hole joinery, which is a super useful technique for many woodworking projects. Don't be afraid to experiment and find your own creative style!

A Versatile Cube Storage System: Customizable and Chic

Now, for something a bit more ambitious! A modular cube storage system allows you to build exactly what you need for your space. You can create a tall bookshelf, a low-slung media console, or even a combination of both! The beauty is in its adaptability.

Materials:

  • Plywood (for strength and stability)
  • Wood screws
  • Wood glue
  • Sandpaper
  • Wood finish
  • Measuring tape
  • Drill
  • Table saw (or access to one â€" cutting plywood accurately is crucial)

Building Your Cube System:

This project involves creating individual cube units and then assembling them to your desired configuration. Using a table saw to cut the plywood accurately is important for a clean, professional look. Think about adding some subtle details, like routed edges or decorative molding, to elevate the design. Let your creativity run wild!

Finding Free Plans and Resources

There are tons of great resources online offering free woodworking plans. Sites like Ana White, Instructables, and Lumberjocks are excellent starting points. Just search for "free contemporary woodworking plans" and you'll be amazed at the variety of projects available.

Tips for Success:

  • Start small: Don't jump into a complex project right away. Begin with a simpler build to gain experience and confidence.
  • Read the plans carefully: Don't rush the planning stage! Understand the instructions thoroughly before you start cutting.
  • Measure twice, cut once: This old woodworking adage is crucial. Precise measurements are key to a successful project.
  • Take your time: Woodworking is a relaxing and rewarding process. Don't rush it!
  • Embrace imperfections: Handcrafted items have character. Don't worry about minor imperfections â€" they add to the charm.
  • Have fun!: Most importantly, enjoy the process! Woodworking is a great way to express your creativity and build something beautiful with your own hands.

Frequently Asked Questions

Q: What kind of wood should I use?

A: It depends on your budget and the project. Pine is inexpensive and easy to work with, while hardwoods like maple, oak, and walnut offer greater durability and a more elegant appearance.

Q: What tools do I need?

A: The necessary tools vary depending on the project, but a basic set includes a measuring tape, saw (hand saw or circular saw), drill, sandpaper, and safety glasses.

Q: Where can I find free woodworking plans?

A: Check out websites like Ana White, Instructables, and Lumberjocks. Pinterest is also a great resource!

Q: I'm a complete beginner. Can I still do this?

A: Absolutely! Start with a simple project like the floating shelf. There are plenty of beginner-friendly plans available online.

Q: How long does it take to complete a project?

A: It depends on the complexity of the project and your experience level. A simple shelf might take a few hours, while a more complex project could take a day or two (or even longer!).

Happy woodworking, everyone! I can't wait to see what you create. Share your projects with me â€" I'd love to see them!